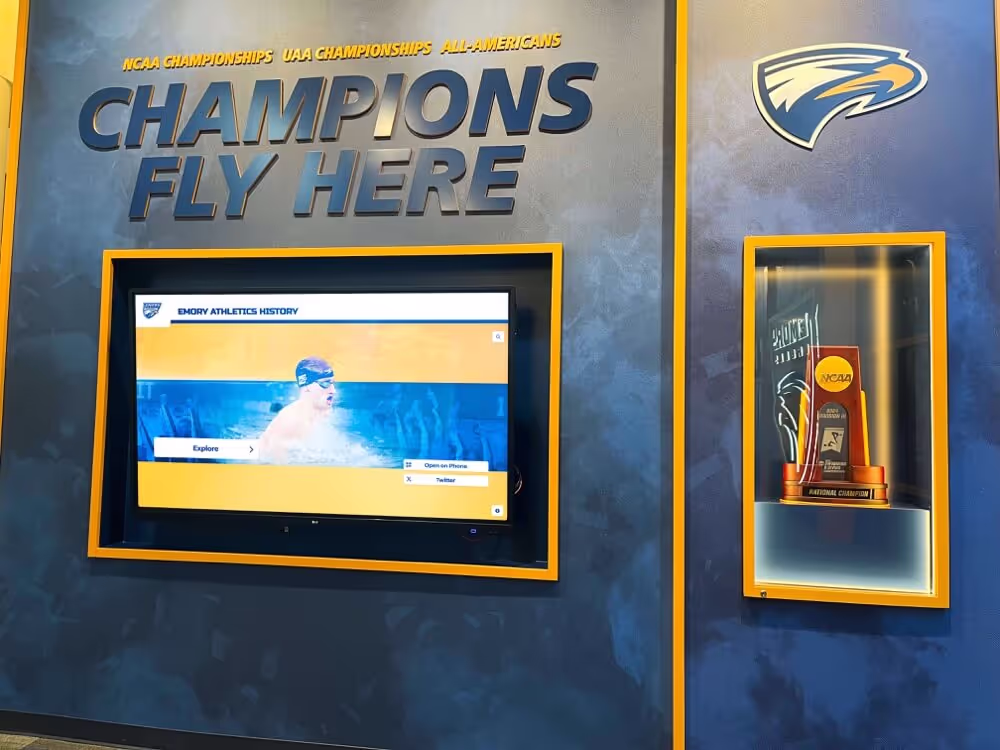
Schools purchasing digital hall of fame displays face a question that determines project success: who handles the physical installation, electrical work, network integration, and mounting in high-visibility areas like the front office? While the technology itself solves recognition challenges, the installation process requires coordination between multiple trades—electricians, network technicians, mounting specialists, and sometimes contractors familiar with school construction requirements.
Most schools discover that the answer depends on their vendor choice, internal capabilities, and whether they prefer turnkey service or want to manage installation themselves. Some vendors provide complete installation services as part of their offering, others ship hardware and leave schools to coordinate everything locally, while still others offer hybrid approaches where they guide the installation but schools hire local contractors.
This guide examines who typically installs digital hall of fame displays near school front offices, what the installation process involves, the pros and cons of different installation models, and how to determine the right approach for your institution.
Understanding the Installation Requirements
Before identifying who should handle installation, schools need to understand what the work entails. Digital hall of fame displays require more than simply hanging a screen on the wall. Proper installation involves multiple technical disciplines that must work together.
Physical Mounting and Structural Considerations
The display must be securely mounted to withstand years of use in high-traffic areas. Wall-mounted displays require locating studs or installing backing boards capable of supporting 100-200 pounds depending on display size. Freestanding kiosk installations need stable bases and potential floor anchoring to prevent tipping.
Front office locations often feature specific architectural challenges—brick or concrete walls requiring masonry anchors, tile finishes where drilling must avoid damaging decorative elements, or locations where load-bearing requirements exceed standard wall construction. Professional installers assess these structural factors and select appropriate mounting hardware.
Electrical Power Requirements
Digital displays require dedicated power circuits that meet code requirements. Most displays draw 200-400 watts during operation, which typically means installing new outlets if existing power isn’t available near the installation location.
Schools must determine whether existing electrical infrastructure supports the new display or whether an electrician needs to run new circuits from the electrical panel. Front office locations sometimes have power readily available, but prominent wall locations in hallways may require running conduit through walls or ceilings to reach the display.

Licensed electricians should handle all electrical work to ensure code compliance and maintain school insurance coverage. Some states require electrical work in schools meet additional requirements beyond residential codes.
Network Connectivity
Digital hall of fame displays need network connectivity to update content, access cloud-based content management systems, and enable remote administration. Installation requires either running Ethernet cables from network switches or configuring wireless connectivity with adequate signal strength.
Wired Ethernet connections provide more stability for always-on displays, but require network cable runs from the nearest switch to the display location. Schools with existing network infrastructure may need network expansion to support the new display location.
Wireless connectivity simplifies installation but requires strong WiFi coverage in the display location and network configuration to allow the display persistent access. Some school networks segment guest WiFi from administrative networks, requiring IT departments to configure appropriate network access for displays.
Installation Provider Options
Schools have four primary options for who handles digital hall of fame display installation, each with distinct advantages and challenges.
Full-Service Vendor Installation
Some digital display vendors provide complete installation services as part of their offering. These vendors take responsibility for every aspect of installation—from initial site survey through final testing and training.
Full-service installation typically includes:
- Pre-installation site assessment to verify power, network, and structural requirements
- Coordination with school facilities teams to schedule work during appropriate times
- All mounting hardware and installation labor
- Electrical work or coordination with licensed electricians
- Network configuration and connectivity testing
- Content management system setup and administrator training
- Post-installation support and warranty service
Rocket Alumni Solutions exemplifies this approach by providing hardware, installation coordination, and ongoing customer success support as a single point of contact. Schools work with one vendor from purchase through installation rather than managing relationships with display manufacturers, installation contractors, and software providers separately.
This model works best for schools that prefer turnkey solutions and want one vendor accountable for the entire project. The cost is typically higher than self-installation, but schools avoid coordinating multiple contractors and troubleshooting when issues arise.
Vendor-Guided Installation with Local Contractors
Some vendors ship hardware and provide detailed installation documentation but expect schools to hire local contractors for physical work. The vendor offers technical support and guidance, but schools manage contractor relationships and ensure work meets specifications.
This hybrid approach typically includes:
- Detailed installation manuals with mounting specifications, electrical requirements, and network configuration instructions
- Technical support via phone or video conference during installation
- Hardware specification sheets contractors need for mounting and electrical planning
- Network configuration assistance once physical installation is complete
- Remote content management system setup after the display is installed
Schools using this approach coordinate between the display vendor, licensed electricians, mounting contractors, and IT departments. The school facilities director or technology coordinator acts as project manager ensuring all pieces come together correctly.
This model costs less than full-service installation but requires schools have staff capable of managing technical projects and local contractors familiar with display installation requirements.

In-House Installation by School Staff
Schools with capable facilities and IT departments sometimes handle installation entirely in-house. This requires the school has licensed electricians on staff (or contracts for electrical work separately), facilities personnel capable of handling structural mounting, and IT staff who can manage network configuration.
In-house installation works best when:
- The school has previously installed similar display technology
- Facilities staff have experience with mounting large displays securely
- Licensed electricians are available on staff or through existing service contracts
- IT departments are comfortable configuring network access for always-on displays
- The vendor provides comprehensive technical documentation and remote support
The primary advantage is cost savings, as schools pay only for hardware and avoid installation labor charges. However, schools must accurately assess whether internal staff have the skills and time to complete installation correctly. Improper mounting or electrical work can create safety hazards and void warranties.
A/V Integration Specialists
Schools sometimes work with audiovisual integration firms that specialize in educational technology installations. These firms handle multiple technology projects for schools and have experience with the unique requirements of educational environments.
A/V integrators typically provide:
- Multi-vendor equipment expertise, allowing schools to select display hardware separately from software and content management
- Experience with school building codes, union requirements in some districts, and scheduling around school operations
- Relationships with licensed electricians and contractors familiar with school work
- Project management across multiple technology installations, potentially bundling display installation with other school technology projects
- Ongoing maintenance relationships for multiple technology systems
This approach works well for schools already working with A/V integrators for classroom technology, auditorium systems, or other installations. The integrator can add digital hall of fame displays to existing project scopes.
The Installation Process Step-by-Step
Regardless of who handles installation, the process follows similar stages that ensure displays are safely and correctly installed.
Phase 1: Site Assessment and Planning
Successful installations begin with thorough site assessment. This phase identifies installation challenges before work begins, preventing surprises that delay projects or increase costs.
Site assessment includes:
- Verifying wall construction and load-bearing capacity at the intended mounting location
- Identifying nearest power sources and determining whether new circuits are required
- Locating network access points and measuring signal strength for wireless installations
- Checking for obstacles behind walls (plumbing, ductwork, electrical conduit) where mounting hardware will be installed
- Confirming display dimensions fit the intended space with appropriate clearances
- Reviewing school access policies and determining when installation work can occur
Schools should involve facilities managers, IT directors, and principals in site assessment. Facilities managers understand building construction and can identify structural issues. IT directors verify network requirements. Principals ensure installation timing doesn’t disrupt school operations.
For schools working with digital hall of fame solutions, vendors should conduct site assessments remotely via video conference or on-site for complex installations. This assessment informs accurate installation quotes and prevents unexpected costs.
Phase 2: Electrical and Network Preparation
Once planning is complete, electrical and network infrastructure must be prepared. This phase happens before display delivery to avoid having expensive equipment sitting unused while infrastructure work is completed.
Electrical preparation includes:
- Installing new circuits if required, running conduit from electrical panels to display locations
- Installing outlet boxes at appropriate heights based on display mounting specifications
- Ensuring circuits meet code requirements for the display’s power consumption
- Adding surge protection appropriate for sensitive electronic equipment
- Verifying ground fault protection if required by local codes
Network preparation includes:
- Running Ethernet cables from network switches to display locations for wired installations
- Configuring network switch ports with appropriate VLAN access and power over Ethernet if required
- Extending WiFi coverage if wireless installation requires stronger signals
- Creating network credentials for the display with appropriate access levels
- Configuring firewall rules if displays need to access cloud-based content management systems
This infrastructure work should happen before display delivery when possible. Installers can test power and network connectivity before mounting heavy displays, confirming everything is ready.
Phase 3: Physical Installation
With infrastructure ready, physical installation involves mounting the display, making electrical and network connections, and verifying secure attachment.
Wall-mounted displays require:
- Locating and marking mounting points on the wall based on display bracket specifications
- Drilling mounting holes and installing appropriate anchors for wall construction type
- Attaching mounting brackets to the wall and verifying level installation
- Lifting the display onto mounting brackets (large displays require two or more people)
- Securing the display to brackets according to manufacturer specifications
- Connecting power and network cables
- Cable management to create clean installations without visible wires
Freestanding kiosk installations require:
- Assembling kiosk stands according to manufacturer instructions
- Installing the display into kiosk housing
- Routing power and network cables through kiosk stands for clean appearance
- Leveling kiosks and installing floor anchors if required
- Connecting and testing all connections
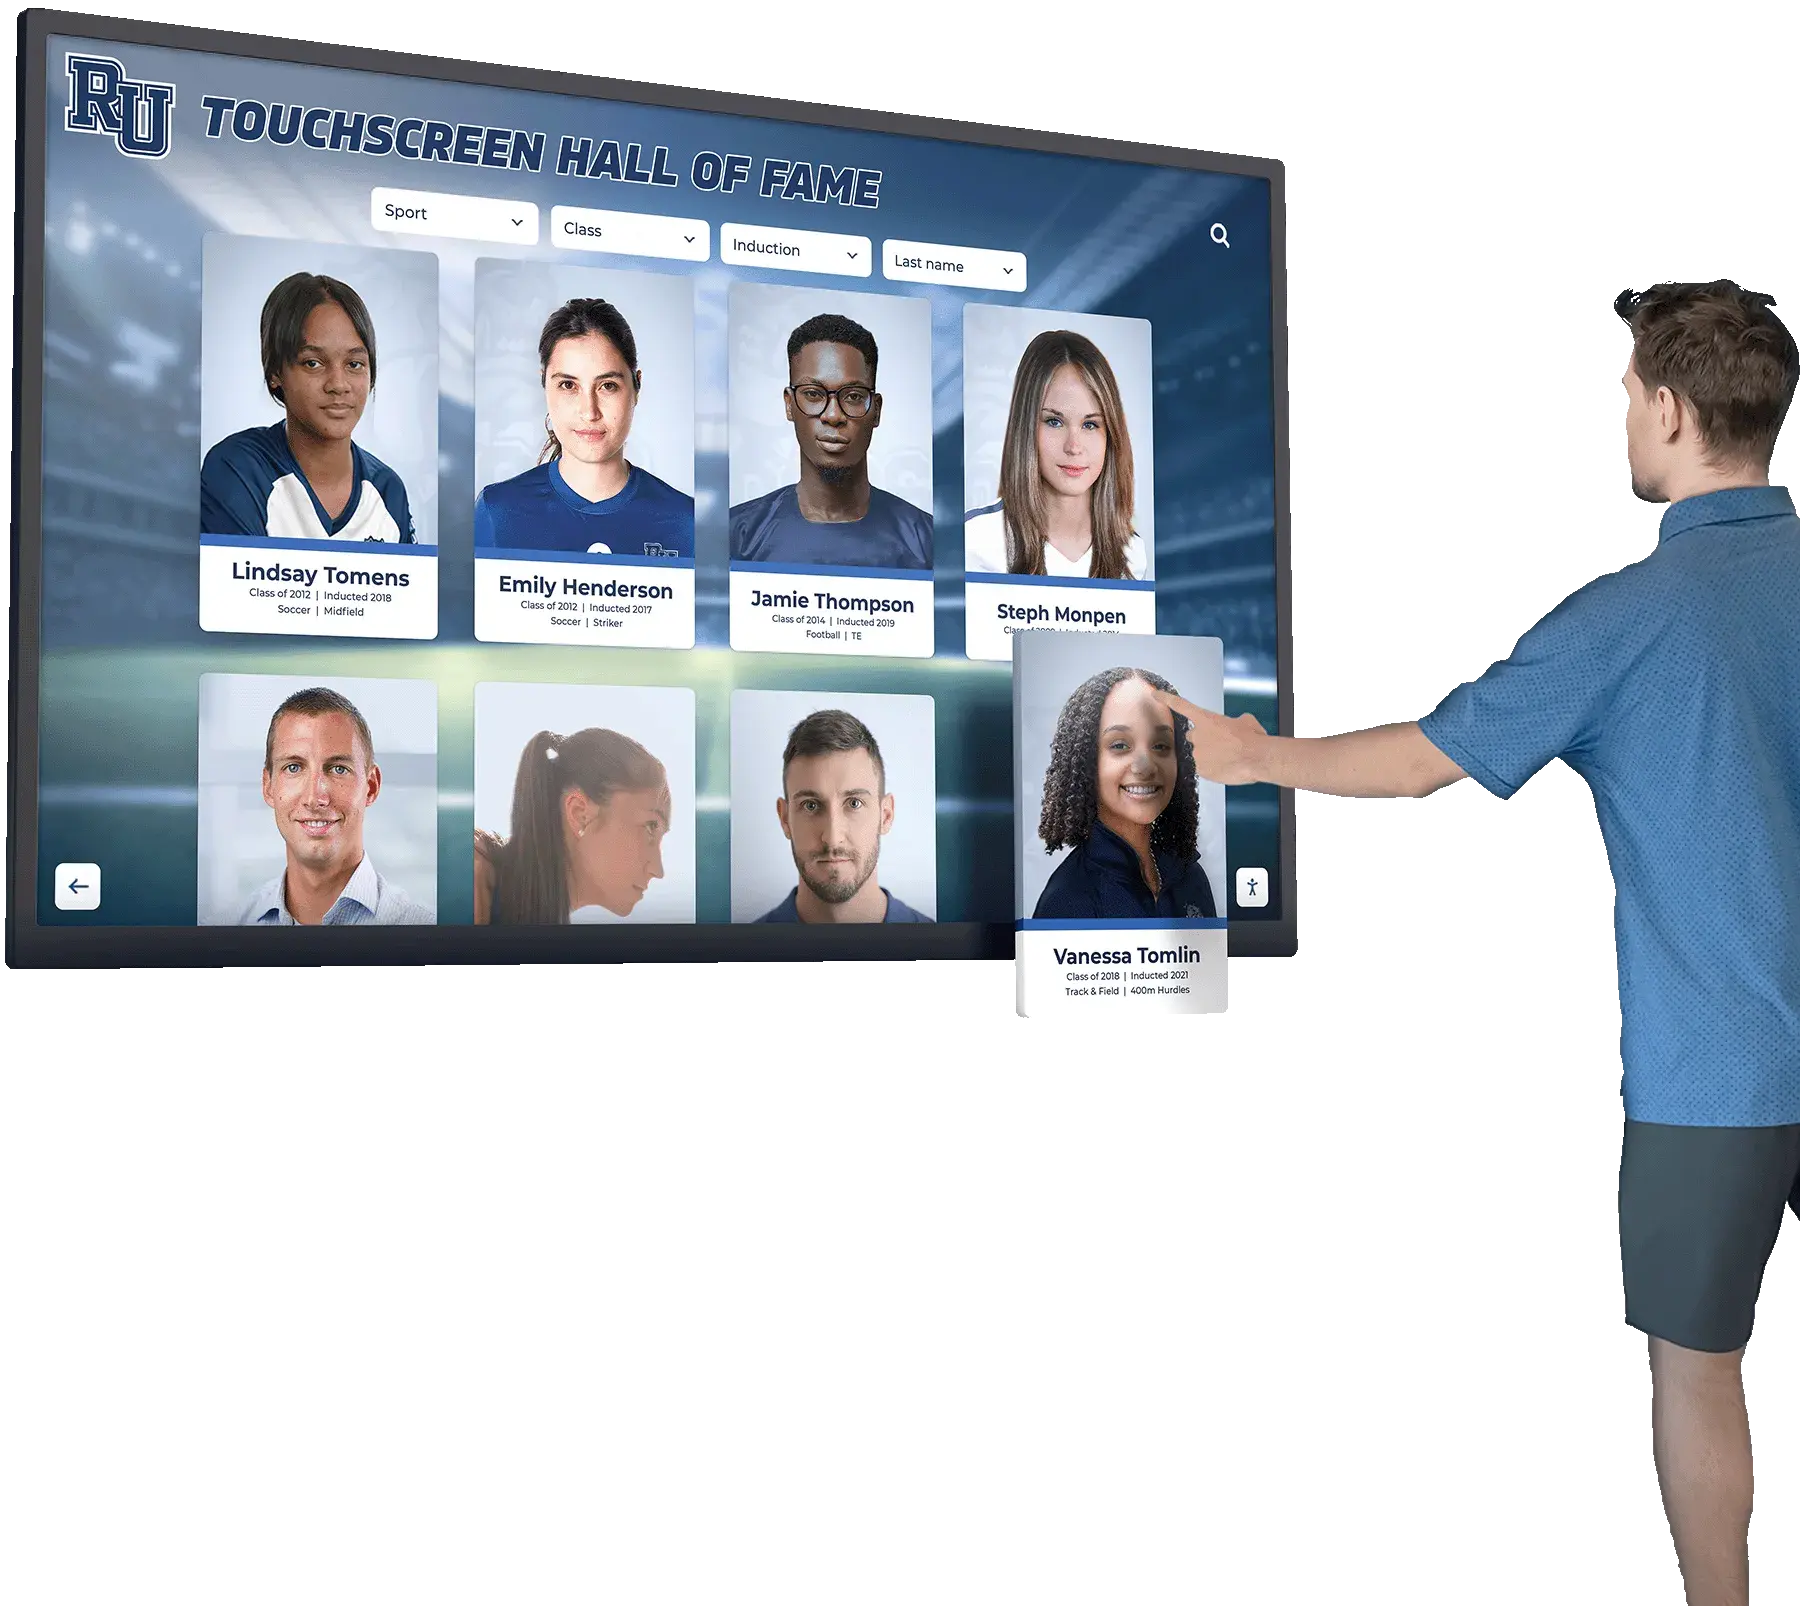
Professional installers verify mounting security before moving to configuration. Displays in high-traffic school areas must withstand bumps, students leaning against them, and years of use without loosening.
Phase 4: Configuration and Testing
After physical installation, displays must be configured to connect to content management systems, download initial content, and verify all features work correctly.
Configuration includes:
- Powering on the display and verifying it boots correctly
- Connecting to the school network and verifying internet connectivity
- Installing or activating content management software
- Configuring display settings (brightness, sleep timers, orientation)
- Downloading initial content and verifying display rendering
- Testing touchscreen functionality if applicable
- Setting up remote administration access for ongoing content updates
Installation teams should test all features before leaving the site. This includes verifying content updates correctly, touchscreen responsiveness works as expected, and remote administration functions properly.
Phase 5: Training and Handoff
The final installation phase transfers responsibility to school staff who will manage ongoing content updates and basic troubleshooting.
Training should cover:
- How to access the content management system
- Adding new content (photos, videos, text, recognition information)
- Updating existing content and removing outdated information
- Basic troubleshooting (display not responding, network connectivity issues, touchscreen calibration)
- Who to contact for technical support and warranty service
- Recommended content update schedules
- Best practices for creating engaging display content
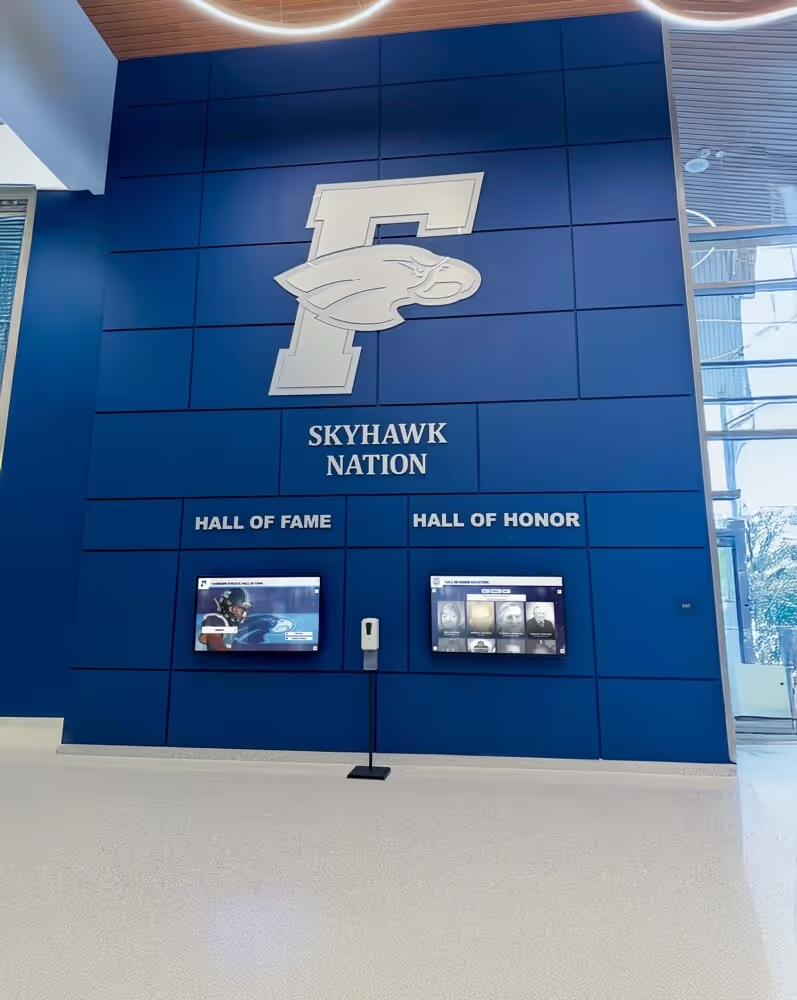
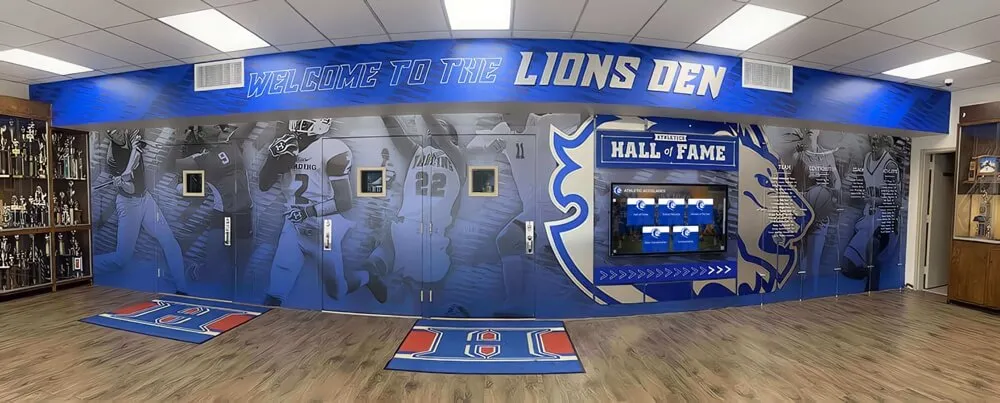
Schools should designate specific staff members for content management training. Many schools assign this to athletic directors for athletics halls of fame, development directors for donor recognition, or communications coordinators for general school recognition.
Key Questions to Ask Installation Providers
Schools evaluating installation options should ask specific questions that reveal whether providers can handle school-specific requirements.
About Installation Experience
- How many school installations have you completed?
- Can you provide references from schools with similar installation locations?
- What is your experience with our specific building construction type (brick, concrete block, steel frame)?
- Have you worked with schools in our state and are you familiar with local code requirements?
About Project Management
- Who is my single point of contact during installation?
- What is your typical installation timeline from purchase to completed installation?
- How do you coordinate work schedules to minimize disruption to school operations?
- What happens if installation uncovers unexpected issues (insufficient power, structural problems)?
About Technical Capabilities
- Are your installation teams licensed electricians or do you subcontract electrical work?
- How do you handle network integration with school IT departments?
- What mounting hardware do you use and how is it rated for load capacity?
- Do you provide as-built documentation showing final installation details?
About Warranty and Support
- What warranty coverage is provided for installation work?
- If something fails, who is responsible for troubleshooting—the display manufacturer, installer, or software vendor?
- What is your response time for installation-related issues after handoff?
- Do you provide ongoing support for content management system questions?
These questions help schools understand whether installation providers have the experience and capabilities to complete installations successfully. Vague answers or providers who haven’t worked with schools before may not understand the specific requirements of educational environments.
Installation Costs and Budget Considerations
Installation costs vary significantly based on who handles installation, project complexity, and school location. Understanding typical cost components helps schools budget accurately.
Vendor-Provided Installation
Full-service vendor installation typically costs $2,500-$7,500 depending on project complexity. This includes all labor, mounting hardware, coordination with electricians if needed, and configuration.
Simple installations—mounting a single display on a wood-frame wall with nearby power and network access—fall at the lower end. Complex installations requiring structural reinforcement, extensive electrical work, or challenging mounting locations cost more.
Turnkey vendors like those offering complete hardware and installation services typically include installation coordination as part of subscription or purchase pricing. Schools know total project costs upfront rather than discovering additional installation expenses after hardware purchase.
Contractor-Based Installation
Schools hiring local contractors typically pay:
- Mounting labor: $500-$1,500 depending on display size and wall construction
- Electrical work: $300-$2,000 if new circuits are required
- Network cabling: $200-$800 for Ethernet runs
- Project coordination: staff time cost for managing multiple contractors
Total costs often range $1,000-$4,500, but schools bear project management responsibility and risk that contractors unfamiliar with the specific display equipment may need additional vendor support.
In-House Installation
Schools handling installation with existing staff eliminate direct installation costs but should consider staff time investment. A straightforward installation might require:
- Facilities staff: 6-12 hours for mounting and coordination
- Licensed electrician: 2-6 hours if electrical work is needed
- IT staff: 2-4 hours for network configuration
- Training time: 2-4 hours for staff who will manage content
Calculate staff time at their hourly rates to understand true in-house installation costs. If existing staff are already busy with other priorities, installation work may delay other projects or require overtime.
Hidden Costs to Consider
Several installation-related costs catch schools off guard:
- Building permits: Some jurisdictions require permits for electrical work or structural modifications
- Infrastructure upgrades: Discovering inadequate network coverage or insufficient electrical capacity during installation
- Extended timelines: Coordinating multiple contractors often extends installation schedules, potentially delaying the display launch beyond planned events
- Troubleshooting unclear responsibilities: When display issues arise, determining whether problems stem from hardware, installation work, or content management software wastes time if responsibilities aren’t clearly defined
School lobby design projects that include digital displays benefit from working with vendors who handle these considerations as part of comprehensive installation services.
Installation Timing and Scheduling
When installation occurs significantly affects project success, costs, and disruption to school operations.
Summer Installation Advantages
Most schools prefer summer installations when buildings are less occupied. Advantages include:
- Minimal disruption to classes and school activities
- Easier access to installation locations without navigating student traffic
- More flexible work schedules allowing contractors longer uninterrupted work periods
- Availability of school staff who might be less available during school years
- Time to test and refine content before students return
Summer installations do face challenges. Facilities staff are often managing multiple summer projects simultaneously. Popular contractors book up early. Schools must plan installations months in advance to secure contractor availability.
School Year Installation Considerations
Installing during the school year requires more careful coordination but is sometimes necessary to meet project timelines.
Key considerations include:
- Scheduling work during evenings, weekends, or school breaks to minimize disruption
- Restricting access to high-traffic areas, potentially requiring temporary barriers or alternative routes
- Noise considerations during instructional time if installation requires loud work
- Shorter available work windows, potentially extending installation timelines
- Greater coordination complexity to avoid disrupting school activities
Schools installing during the academic year should plan installations during natural breaks (fall break, winter break, spring break) when possible.
Event-Driven Installation Deadlines
Many schools want displays operational for specific events—homecoming, hall of fame induction ceremonies, major donor recognition events, or building dedications. Event-driven deadlines create installation pressure.
Best practices for event-driven installations:
- Plan installations at least 6-8 weeks before the target event
- Build buffer time for unexpected delays (equipment shipping delays, contractor scheduling changes, infrastructure surprises)
- Have contingency plans if installation can’t complete before the event
- Order content preparation before installation completes so displays can go live immediately after installation
Vendors familiar with athletic recognition displays understand event deadline pressures and build realistic installation schedules that account for inevitable complexity.
Ongoing Maintenance and Support Responsibilities
Installation responsibility often determines ongoing maintenance and support responsibilities. Schools should clarify these expectations before installation begins.
Hardware Maintenance
Who handles hardware issues after installation warranty periods expire? Questions to address:
- Display malfunctions (screen problems, power issues, component failures)
- Mounting hardware that loosens over time
- Touchscreen calibration or responsiveness issues
- Physical damage from impacts or vandalism
Some vendors provide ongoing hardware support and maintenance as part of subscription models. Others sell displays with manufacturer warranties but leave schools to handle repair coordination after warranty expiration.
Software and Content Management Support
Digital displays require ongoing software support including:
- Content management system updates and feature additions
- Troubleshooting content display issues
- User account management as staff turnover occurs
- Training new administrators after staff changes
- Adding new content types or features as needs evolve
Schools should understand whether software support is included long-term or requires ongoing fees. Digital signage content management systems vary widely in included support levels.
Network and Connectivity Support
IT departments typically handle network connectivity issues, but display-specific network requirements may need vendor support. Clarify:
- Who troubleshoots when displays lose network connectivity
- How content management systems authenticate on school networks
- Support for network changes (new WiFi systems, VLAN reconfigurations)
- Remote access requirements for vendor technical support
Making the Right Installation Choice for Your School
Selecting who installs your digital hall of fame display depends on school capabilities, budget constraints, project complexity, and desired accountability.
Choose Full-Service Vendor Installation When:
- Your school has limited facilities or IT staff availability
- Installation location presents complexity (structural challenges, difficult electrical access, complex network requirements)
- You want one vendor accountable for the complete project
- Budget allows for professional installation services
- Timeline requires coordinated installation without staff managing multiple contractors
- Previous technology projects suffered from unclear vendor responsibilities
Full-service installation costs more but delivers predictable outcomes with single-point accountability.
Choose Vendor-Guided Installation with Local Contractors When:
- Your school has staff capable of managing technical projects
- You have relationships with reliable local contractors familiar with school work
- Budget constraints make full-service installation prohibitive
- Installation location is relatively straightforward
- Your facilities team prefers working with known local contractors
- You’re comfortable troubleshooting if installation issues arise
This approach saves money but requires schools invest staff time coordinating the project.
Choose In-House Installation When:
- Your facilities team has installed similar displays previously
- Licensed electricians are on staff or readily available through existing contracts
- IT staff are comfortable with display network integration
- The vendor provides comprehensive installation documentation
- Installation location presents no unusual complexity
- Budget is extremely constrained and staff time is available
In-house installation minimizes direct costs but requires honest assessment of staff capabilities and available time.
For many schools, working with providers who offer comprehensive installation and support services provides the right balance of professional installation, ongoing support, and clear accountability that ensures displays remain functional and valuable for years.
Conclusion
Digital hall of fame displays transform how schools recognize achievement, but successful implementations require proper installation by qualified professionals or capable school staff. Understanding installation requirements, evaluating provider options, and choosing the right approach for your school’s specific situation determines whether displays become valued recognition tools or sources of ongoing frustration.
Schools must coordinate physical mounting, electrical power, network connectivity, and configuration regardless of who handles installation. The key is selecting an installation approach that matches school capabilities, budget, and desired outcomes.
Whether you choose full-service vendor installation, coordinate local contractors, or handle installation in-house, thorough planning and clear responsibility definition ensure displays are safely installed, properly configured, and ready to celebrate your school’s achievements for years to come.
Ready to explore digital hall of fame displays with complete installation support? Talk to our team about turnkey solutions that handle every aspect of bringing interactive recognition to your school’s front office.